How to install the FlexiSnap magnetic access door
Forget about the tools and loss of time required to adjust and conceal an opening. It will take approximately two minutes to install the FlexiSnap magnetic access panel. This corresponds to a 90% savings in installation time compared to other access panels currently on the market.
INSTALLATION STEPS
Would you like to see how the FlexiSnap magnetic access panel is installed in drywall? Here are the various steps:
CUTTING TEMPLATE
Use the template provided and follow the instructions below.
- Cut the template along the lines corresponding to the desired opening.
- Apply that template on the wall and ceiling with the aid of a level.
- Trace the panel opening and cut the drywall.
- The opening must be perfectly straight, otherwise the panel will not be squared once installed. Existing opening: adjust the height and width of the opening, if necessary. New opening: use the proposed dimension for your product or cut the surface to the desired dimension. Non-standard opening: See the step entitled “Frame adjustment”. Note: The opening must be at a 2 inch (51 mm) minimum distance from the adjacent wall.
FRAME ADJUSTMENT
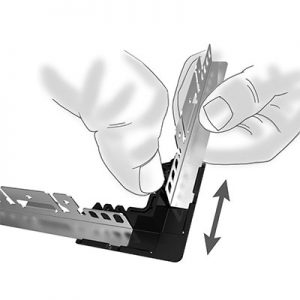
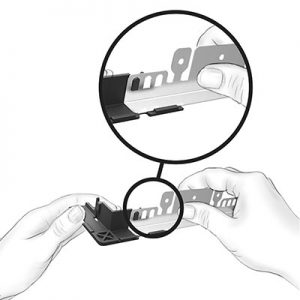
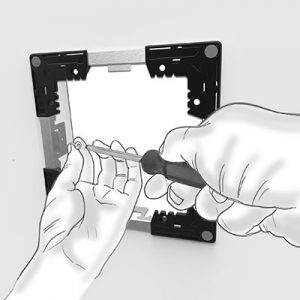
- Unhook each tab by gently pressing inward (image 1).
- Slide the metallic piece from one side to the other and place the tab into one of the three holes (image 2).
- Adjust the frame to the appropriate dimensions.
-
1
-
2
FRAME INSTALLATION
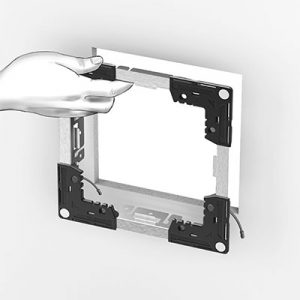
- Insert the frame into the opening (image 1).
- Fold the tabs on all sides (image 2).
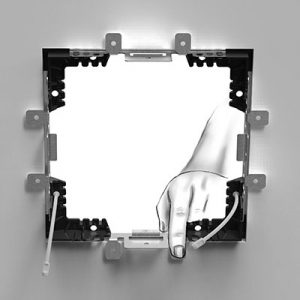
- If there is a solid structure, screw the tabs when required (image 3).
- If there is an obstacle, fold the tab or tabs when required (image 4).
-
1
-
2
-
3
-
4

DOOR CLOSURE
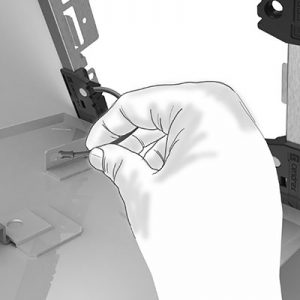
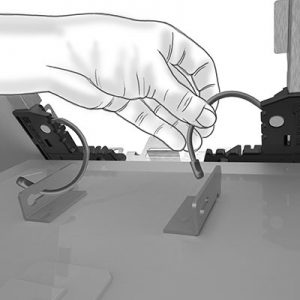
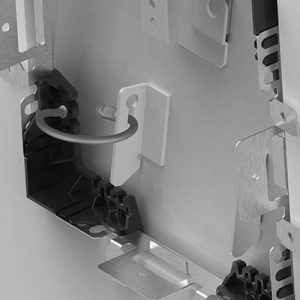
- Insert the security cables into the door glides. (image 1 and 2).
- Align the door glides to the respective notches on the polymer corners.
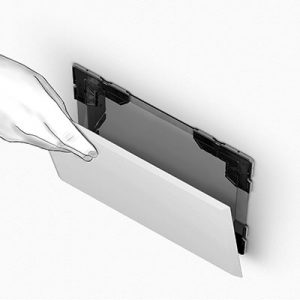
- Carefully insert the door glides and close the panel. (image 3 and 4).
-
1
-
2
-
3
-
4
REMARKS AND RECOMMENDATIONS
- If placed too close to electronic equipment, the polymer corners, containing a magnet, can create an interference. (3 inch – 76 mm magnetic field).
- If you would like to paint the panel or cover it with wallpaper, it is recommended that you clean and lightly sand the surface first.
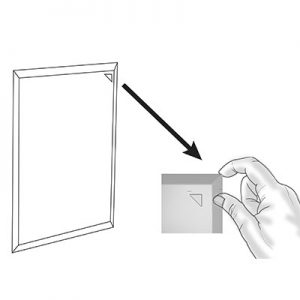
- To open the panel, insert a fingernail or a small, flat screwdriver into the corner identified by a triangle. (image 1).
- Cendrex guarantees the panels against defects in material and workmanship for the duration of the product life. This warranty applies to normal conditions of use and excludes damages caused by misuse or poor maintenance. The warranty is limited to replacement of the defective product or by a product of similar quality and excludes any other costs or damage.
-
1
PERFECT ADJUSTMENT
The FlexiSnap frame can be extended in height and width to perfectly fit the dimensions of the opening. Adjust its size with the help of the installation template provided on the back of the packaging. Hold it in place with the help of the folding tabs. No screws or studs are necessary.
Once the frame is in place, simply insert the metal panel and you’re done! The magnets located on the four corners of the frame will solidly hold the panel in place while allowing you to easily remove it when you need to access the wires or pipes hidden behind it.
READY TO BE PAINTED EXTERIOR FINISH
The metal panel is coated with a high quality, white powder primer, allowing you to paint it the color of your choice or to cover it with wallpaper so that it will blend into your decor. You will get a professional looking finish for a fraction of the price, without any effort!